installation and configuration
http://dl.thezonemanager.com/slamd/
SLAMD Server:-
1. To install the SLAMD server using this package, simply extract the contents of the appropriate archive into the location on the filesystem in which you wish to use SLAMD.
2. define the JAVA_HOME environment variable,
3. Start server bin/startup.sh
4. you should be able access the SLAMD administrative interface in a browser using the URL http://{address}:8080/slamd
SLMD Client:- slamd_client-1.8.0.tar.gz
1. The process of installing the SLAMD client is as simple as extracting the archive containing the client files into the desired location on the client system
2. Configure slamd_client.conf
- vi /root/slamd_client/slamd_client.conf
- Add server host/port in SLAMD_ADDRESS/SLAMD_LISTEN_PORT
3. If you just wish to start a single client, then the start_client.sh shell script can be used to do this on UNIX systems
Note: In both cases, it will be necessary to comment out or remove two lines near the top
of the file that require the file to be edited before it can be used to start the client/server.
How to start test?
1 Goto to slamd admin url - http://<hostt>:8080/slamd
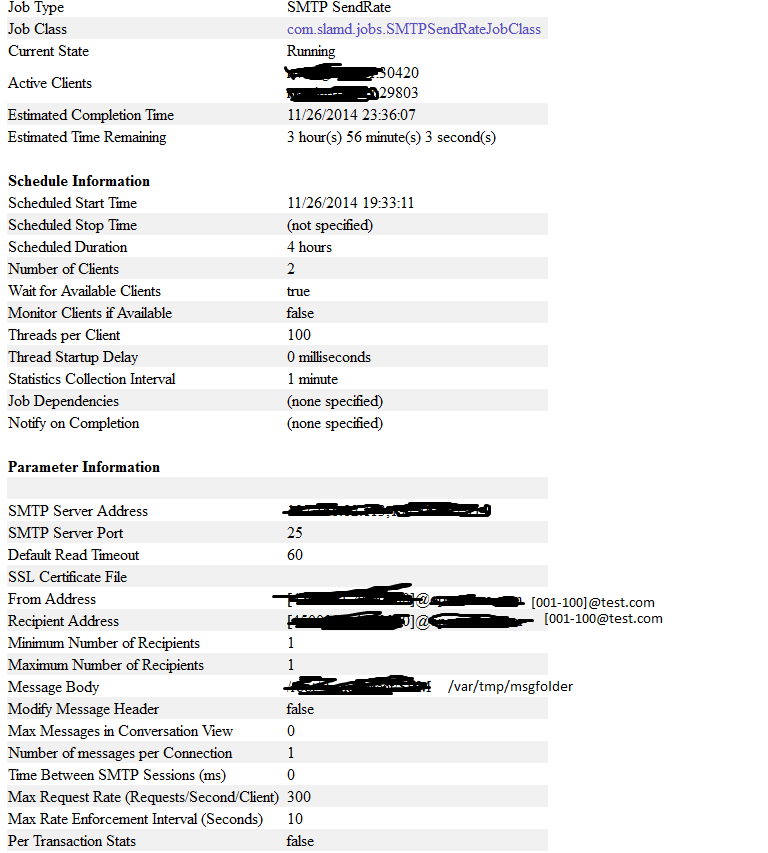
2. Schedule the job.
3. Mail Job Classes > SMTP Send Rate
3. Add details in next page
- Description,Name, Thread per client,
- From address, Receipent Address: [10000-20001]@xyz.com
- Mesage body - <path of msg file>
- Max Request Rate(TPS) : -

No comments:
Post a Comment